
Rehab: Return to Play Goals
A lot of athletes and coaches have reached out with questions about their specific injuries and what their return to play process should look like. Our aim with this thread is to break down the rehab process from the Principles perspective so that can then be applied to injuries all over the body

Acute Stage
This stage will vary greatly based on the injury. The general goals here will be to manage discomfort, evacuate swelling, early range of motion (in most cases), all looking through the lens of do no further harm to the damaged tissue. The aggressiveness of this stage will be dependent on the severity and type of injury. For example, it is usually a good idea to be pretty aggressive with early range of motion work on a standard ankle sprain. On the other hand, it is typically not a good idea to be aggressive with ROM work if it increases stress or inflammation to the injury site. An example would be not to keep pushing a shoulder with posterior impingement in Max ER where symptoms occurs early on or you will continue to “rip off the scab” of the inflammation process.
Achieve Pain-Free Active Range of Motion (ROM)
The next goal of the rehab process with be to achieve Full, Pain-free ROM. The speed of this will vary, but this is must hit foundation before fully transitioning to future stages. There are many methods that may be used here from lymphatic drainage to FRC principles to neurological retraining if there is hesitation or guarding in this stage. Some light resistance and isometric work may also be a good option in this phase.
Introduce Resistance to Full ROM
Early stage resistance is best done by a clinician manually who can control and slowly increase the load in this early stage of introducing resistance. This is usually best controlled with isolated movements of that body segment. Example of this would be Elbow Flexion and Extension Manuals for a Post-Op Tommy John Athlete.
Progress to High Loaded Compound Movement
Before the athlete starts moving that body segment at high speeds, it is important to introduce high loads (in most cases). In longer rehab processes, this may involve a progression of increasing the weight until reaching what their “normal” push/pull load would be. An example of this would be building up both Lower body Push and Pull movements for an Athlete with a Hamstring Strain.
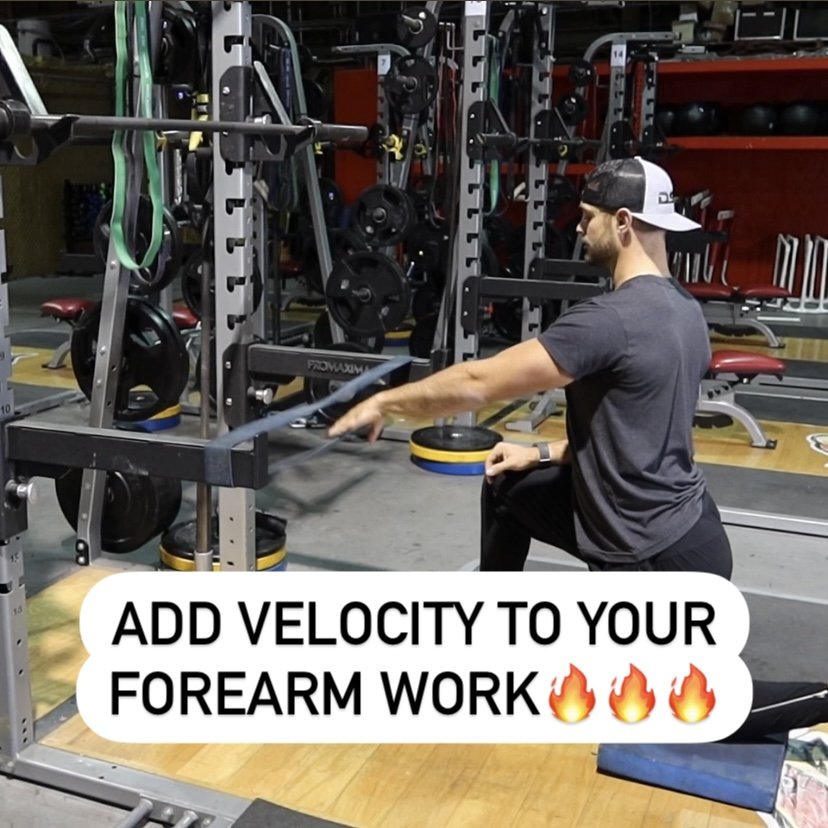
Add Velocity to Movement (Plyometric Phase)
This can be an often missed step of a return to play progression. After the athlete has demonstrated he can move under relatively heavy load, it is important to re-introduce moving that body segment at high speeds, stressing the injured site. This is where both upper and lower body plyometrics will fit in. An example would be: A Tommy John Athlete first completing 2 handed Medicine Ball plyometrics then progressing to a more throwing specific throwing plyometric. It is important to note, this process should stress the damage tissue.
Resume and Progress Baseball Activity
At this point, we have fully prepared the athlete to resume the baseball activity that was discontinued at the time of injury. Oftentimes, athletes can continue some baseball activities that do not cause symptoms or further damage the injured tissue. That aspect is more injury specific, but with most injuries (especially no-operative) a complete shut down is not necessary. There are many tools that can be used to track and rebuild the baseball workload, but the general principle is the staircase model that includes consistent progression, but no huge spikes, to rebuild their chronic workload.
In Summary, our goal was to provide a principle based framework that can apply to MOST rehab Return to Play scenarios. Sometimes, this process will be a full year process and other times it can be ran through in a week. Throughout this whole process, it is also a chance to improve any global impairments or underlying factors the athlete presents. Another thing to note is, at times, some of these phases will overlap and be going on at the same time. Again, this is not an exhaustive list and this is not medical advice rather an informative framework. We advise seeing a high level medical professional in your local area to oversee and advise you throughout this process.
If you are looking for the best Throwing Arm specific strengthening program to pair with this process, check out our Armored Heat Pro Program and App at the “GET ARMORED HEAT” tab up top
This Blog will explain our Game Changing process:
https://www.armoredheat.com/armored-heat-blog/biggest-arm-care-flaws